Showing posts with label fall. Show all posts

Wednesday, November 10, 2010

Stuffed Baked Apples

I love apples.

Unfortunately I haven't been able to go to an apple orchard this fall like Miss Kelley. :(

I decided to make another recipe from the Today Show. The recipe is called Savory Stuffed Baked Apples. You can find the recipe here.

The ingredients were simple. The only ingredient that I hadn't used before was sherry. I knew what it was, but this is the first time that it has shown up in any recipes that I have attempted.

Ingredients:
3 slices of bread with the crust removed (I used white because I can't have very much wheat)
3/4 cup milk
1 lb ground beef, pork, or veal (I used beef because I won 10 lbs at a meat raffle, not kidding)
2 slices of bacon
1 onion
1 garlic clove
1/4 teaspoon cinnamon
a handful of chopped parsley
salt
6 large baking apples
1 tablespoon lemon juice
olive oil
1 tablespoon of sherry

Start by preheating the oven to 425.

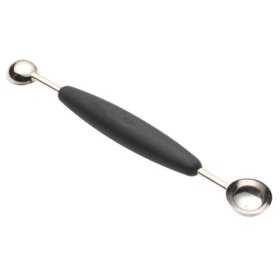
Core the apples and expand the openings.
This was challenging. I used a melon baller. That worked pretty well.Tear up the bread into small pieces. Soak the bread in the milk for 10 minutes.

The recipe called for rubbing lemon juice on the apples. I've done this before to limit the browning on apples. With this recipe, it didn't seem completely necessary because there wasn't much time between coring the apples and baking them.

Mince up the garlic and chop the onion. Toss the meat, garlic, chopped parsley, salt, cinnamon, bacon, and onion in with the soaked bread. I fried my bacon, but this was unclear in my recipe. I was just assuming that it was supposed to be cooked. Now, stuff this meat mixture into the cored apples. I had an abundance of extra meat mixture. I ended up coring more apples to finish the rest of the meat mixture.

Drizzle the stuffed apples with the sherry and olive oil.

Bake for 35 minutes. My apples exploded a little. It didn't seem to impact the flavor. They were delicious and juicy.

When I make this again, I'm going to try pork. It seems like pork and apples are a better combination. I remember eating pork chops and apple sauce as a child.

Thursday, October 28, 2010

Apple Pie

I partook this year in the quintessential fall activity:

Apple Picking!  And while the place of choice this year lost 90% of their crop in May, there were still lots of apples to be had.  

You just had to work for it:

Having fun with my apple picker.

Successful Apple Picker
I was saddened to hear that this small gorgeous little farm in Vermont had lost so much of their crop due to the rains in May.  Can you imagine?  It's 90% of their revenue!  I love supporting these local businesses - so I was more than happy to pick apples, eat a cider donut and obviously, visit the corn maze*.  

I wish I had paid closer attention to the actual types of apples I picked, but alas, I was having too much fun to be bothered.  I picked two different types - one which had a softer texture and one that was nice and crisp and firm.  I love my apple crisps and tart.  In fact, my favorite apples are Honeycrisp and they singlehandedly make me love fall.

My apples didn't look like they were going to last more than two weeks, so I decided to chef up a little pie, using this very simple recipe from Epicurious:

Apple Pie
Pre made pie crust
1 firmed packed cup brown sugar
1 tbsp ground cinnamon
3 1/2 pounds apple, cored, peeled and sliced

1 cup all purpose flour
1 cup sugar
2 sticks unsalted butter, cut into pieces.


Preheat your oven to 450 degrees.


The most time consuming part is getting the apples ready.  This recipe suggests Granny Smith apples, but I think any crisp firm baking apple will do quite well.  Really just depends on what you prefer.


Once your apples are all set, mix the brown sugar and cinnamon together and then add in the sliced apples.  Give a good toss until the apples are fully coated. 

Go ahead and sample a few...
Pour the apples onto your pre-made pie crust (or if you're an overachiever, a homemade pie crust).  I err-ed on the side of overfilling, which I think was a good call in the end.  These are tightly arranged, and I did have some extras, so just fill it until it's full and eat the rest.  


I am trying to get artsy with my camera shots.... what do you think?


Now it's time to get to work on what will become a delicious crumbly crust.  Chop up your sticks of butter into pieces.  Slightly chilled will work best.  


Combine flour, sugar and butter pieces in a bowl.  Now it's time to drop the dainty act, get down to business and make some delicious crumbly crust.  Get your hands in there and get to mixing.  You want to combine until the mixture is crumbly.  It takes a bit, you really needs to dig down and make sure you got the flour and sugar mixed up completely.

Keep going until it looks like this.  VOILA!
At this point, it's time to top the pie with the crumbly mixture.  

Aren't you excited!!?!?!?
Put this baby in the oven at 450 degrees for 20 minutes.  After 20 minutes, reduce oven temperature to 350 degrees.  Bake until the crust is golden brown and the apples are tender.  


By the time this baby had baked and cooled to appropriate temperature (at least 20 minutes), it was time to have a piece.  Just one.  Just a sliver.  Just a little something tasty before heading on into bed.  

Aren't you proud of my apple pie in "moderation"?

Yum.  The crumbly crust has molded into one crispy, tasty topping.  The apples were soften than I would have liked, but the flavor was awesome.  The pre-made pie crust tasted exactly like you might expect a pre-made pie crust to taste (you can also skip the bottom crust if you want, just spray the pan appropriately).  Last time I made an apple pie, the pie filling spread out all over the place when I cut into it, but this one was perfection.  

mmmm.... happy fall to me.

calories:  bad news bears.  it's apple pie - just eat it and love it in moderation.

Tuesday, September 28, 2010

Ravioli Vegetable Soup

There's been a clear chill in the air lately... a very familiar Fall crispness has arrived.  It's time to pull out the down comforters, throw open the windows and park your butt on the couch on Sundays.  It's also time to dig out the crock pots and start making some seriously warm and hearty meals.  As I planned out a weeks worth of menus this past weekend, I saw a glaring trend - most everything was very fall feeling - squash, apples, pumpkin, soups.  Subconsciously, I must be ready for a change in season.

I bring to you:

Ravioli Vegetable Soup
1 bag of frozen peppers, thawed and chopped
2 cloves minced garlic (or crushed)
1 Tbsn Olive Oil
1/2 tsp of red pepper flakes (optional)
1 can of crushed tomatoes
1.5 cups of water
20 oz of chicken broth (or vegetable broth)
1 package of ravioli of your choosing (anywhere from 6 to 14 ounces is fine)
1 zucchini
1 Tbsp of dried basil
Salt/Pepper to taste


Heat a little EVOO in a saucepan and when heated, add in peppers, garlic and red pepper.  Allow to cook for a few minutes, constantly stirring as to not stick to the bottom of the pan.  Let the flavors heat together as you saute.  Take a deep breath..... this is one of my favorite smells.  Peppers and garlic... OH MY!

Add in your tomatoes, broth, water and basil.  Allow to come to a boil. Again, keep stirring.  You don't want to burn any to the bottom of your pan.

Once boiling, add in your raviolis.  According to the recipe I followed, you're supposed to cook them three minutes less than directed on the package.  I imagine this is so they don't get mushy.  Don't sweat this... I didn't time mine.... I was doing dishes and I turned around and they had floated to the top.  This was a clear sign to hurry up and move on to the next step. Typically, when raviolis float, they are done cooking.


Attention!  We've got floaters!

Reduce heat a bit and add zucchini's.  Cook on medium heat until they are firm/tender/soft.  Not too soft... not too firm.  Fine balance.  (As you can see here, I clearly need a BIGGER saucepan.)  (And someone to clean up this splattery disaster on my stove.)


Add fresh ground pepper to the soup and serve.  Ta-da!


This homemade soup was wicked easy to make... and what I love most about it is that you can tailor to your tastes.  Love Zucchini?  Add more, add less.  If the soup feels to thick, add more broth.  Mix up your herbs to add different flavor.  Go nuts kids, it's your show.  It was a perfect creation for a leisurely Sunday.

I got five separate servings of this.  I separated into tupperwares and froze two of them for a later date.  If you decide to freeze, fill up to the top of the tupperware, leaving about a cm or half inch free.  This will allow the soup to expand a bit (which it will), but not so much that it forces itself out of the tupperware.  But it also reduces the space for freezer burn, so you can keep it frozen longer.

Total calories:  Approximately 1,200 - five servings: 240 each.